


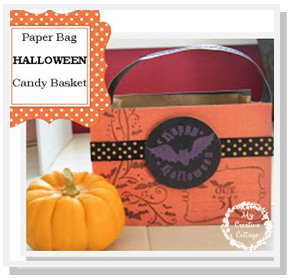
Make this super cute Halloween candy basket using a paper lunch bag!
I needed a quick way to put out candy at my Open House so I made this little candy basket. It is so quick and easy to make. They would make fun gifts for teachers too.
Supplies Needed:
Paper Lunch Bag
Cardstock (great use for scraps.)
Stamps (or other embellishments) and ribbon
Directions:
Cut down paper lunch bag to your desired size.
Cut cardstock into 2 pieces. These will cover the front and back of the bag.
Stamp or decorate cardstock with bats and flourishes.
I made my own embellishment by heat embossing the purple Happy Halloween image on the black circle. I like the pop of color.
Attach cardstock pieces to the bag, on the front and the back.
Cut a strip of cardstock for the handle.
I added ribbon to the cardstock to reinforce it.
I stapled the ends of the handle to the sides of the bag making an x. That way it looks like a decoration too.
Now, fill it with your favorite treat and enjoy!
I hope you enjoyed this quick and easy project. I can’t wait to do it again with other papers for other holidays.
Now, it’s YOUR TURN! Can you imagine the possibilities?
I would love to see what you make! Leave a link in the comments and I’ll be sure to stop by and see your project!
Until Next Time-
Happy Creating!
Sarita

I just love these lunch bag projects. This one is soooo cute!