


I am loving digital scrapbooking! I was able to create these pages in very little time. I am out to have fun and try things I wouldn’t DARE do in classic scrapbooking or maybe I would. I encourage you to play too! As more of you, my brave customers and readers, are trying this fun and fabulous program I thought it would be fun to share what I have recently discovered.
3 Tips to Encourage You
#1 YOU CAN’T BREAK IT! Go ahead and try different things. Your layout is “automagically” being saved as you work on it, so even if your computer acts up during the process, you don’t have to worry about it being lost.
#2 There is an UNDO button. Life doesn’t have one, but this does!! Isn’t that great? Talk about FREEDOM. So, go ahead and try it. You dont’ have to worry about ruining a piece of paper or photo because you cut it wrong or laying down a sticker you can’t move.
#3 HELP is always there. I love the HELP button. I use it often and with the great tutorials with pictures it is easy to use! You can find it in the upper right hand corner.
You can click on any layout to see more of the details.
Tip #4. Split a Photo
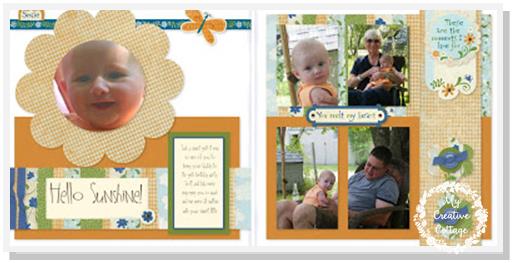
Tip: To get the split image photo simply drag the same photo into both photo wells. Once in the well it can be moved to make it into one photo with a split. It’s just kind of a cool thing you can do that I just stumbled upon. If you look at the journaling, you will notice a word is missing at the end, “smile”. I am going to stamp my own word and add it when I get my layouts. I’ll let you know how it goes.
Tip #5. Layering Stickers

Tip #6 Add a Text Box Over Photo
Tip #7 Sepia Picture

#8 Shorten Your 12″ Border
Paper Kit Used: Olivia
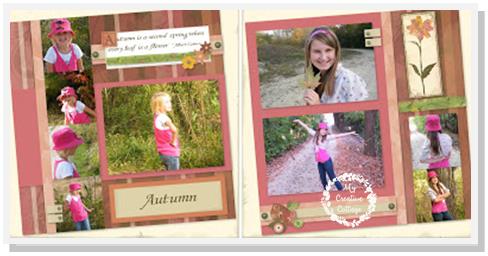
#9 Use a Sticker With Your Journaling
Tip: Here I used 2 different stickers for journaling that had lines. I dragged and dropped the stickers where I wanted them and then I added text boxes over them. Again, I made sure the box had no background. I was able to see where the words lined up or resize or adjust font size to make it work. It may not be perfect, but it worked.

Paper kit used: Class Act
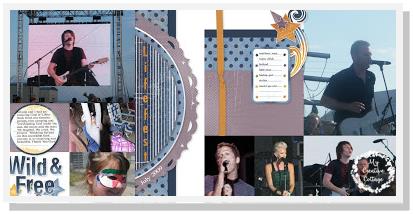
#11 Use the Same Picture Twice
Paper kit used: Zippidee
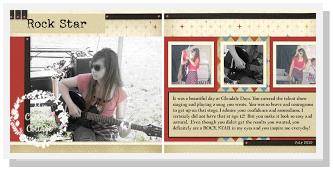
Here I used the same picture twice. Once in the large photo well and then again on the right hand side.
First time I edited and used the color saturation option which took out most of the color in the layout but left the brighter colors of her clothes. I LOVED the way it turned out. Then, the second time once I had the photo in the well, I zoomed in on just her hand on the guitar strings and for added insterest I color saturated again and then made that black and white. It gave it a very different vibe.
I hope you have enjoyed these tips and layouts. I would love to see what you are creating these days! Be sure to leave me a comment and a link!
Until Next Time-
Be Blessed!
Sarita
