


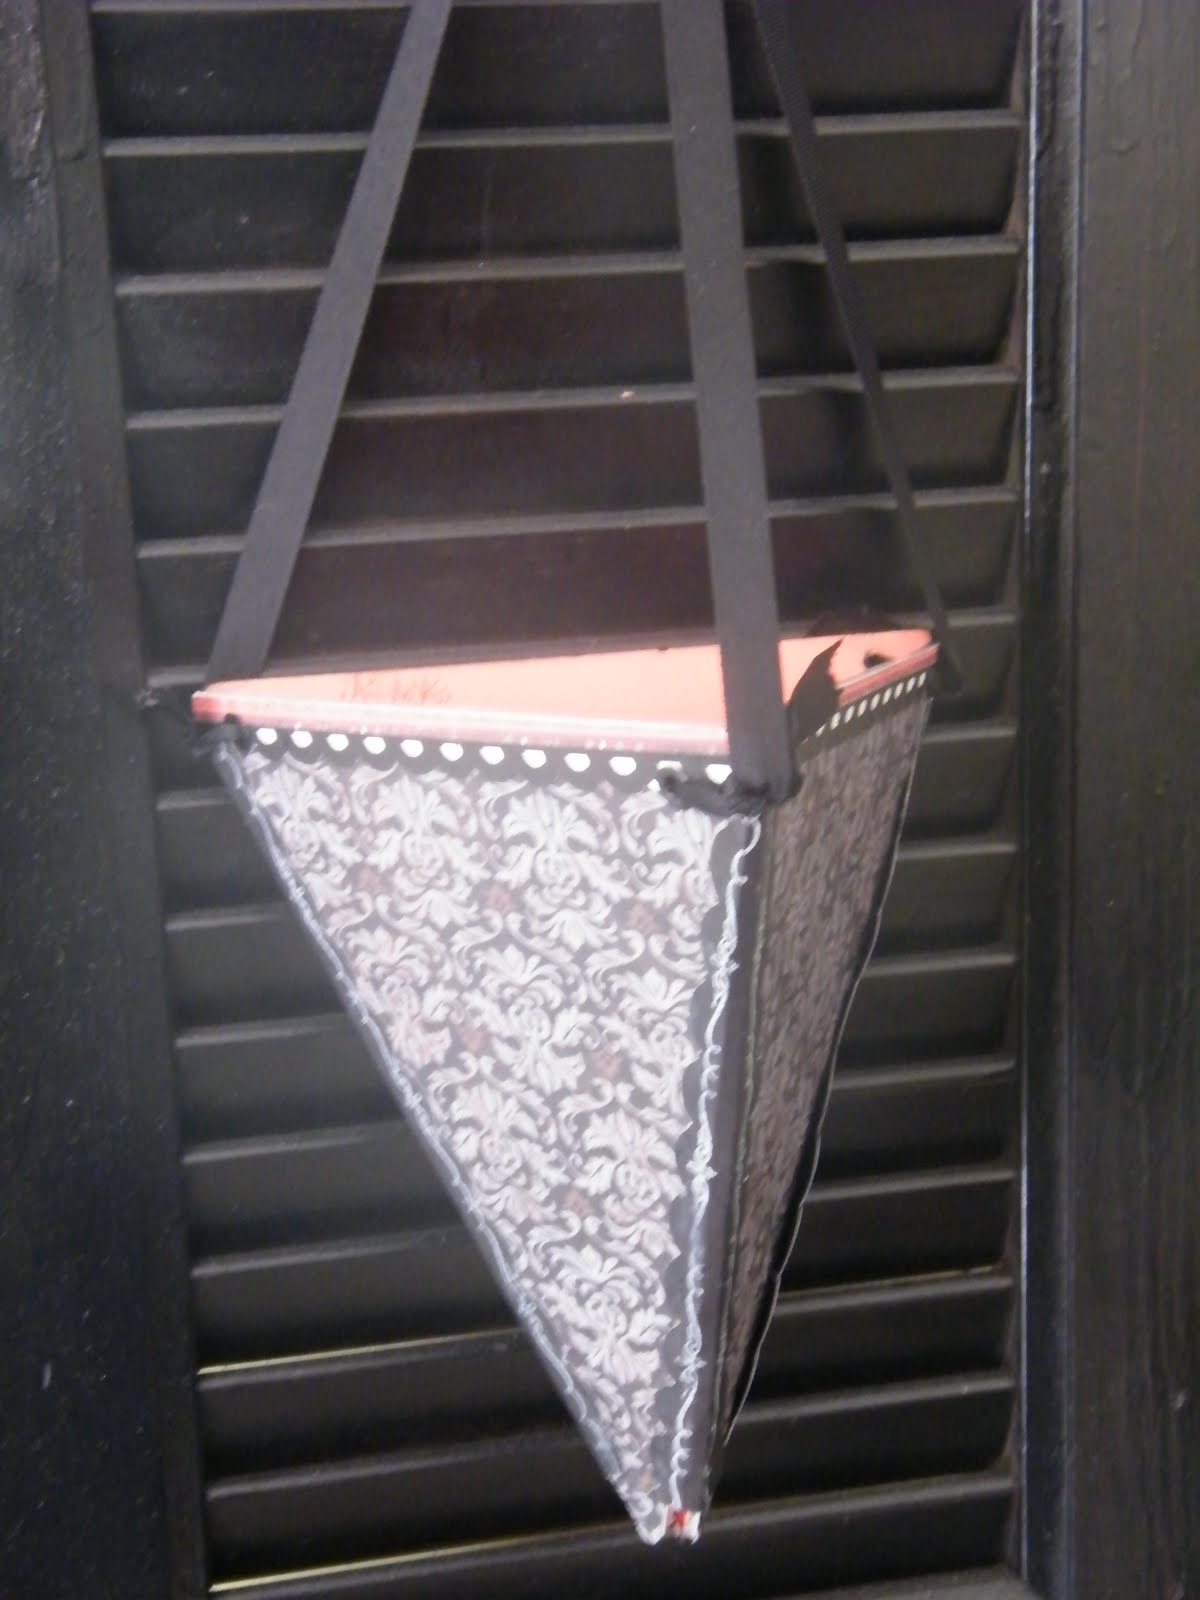
Can you believe this super fab cone treat holder was made with just 3 chipboard pieces from a CTMH My Creations Banner? I was so inspired when I spotted something similar at convention. I knew immediately I had to make one with our elegant yet sassy Mischief Paper.
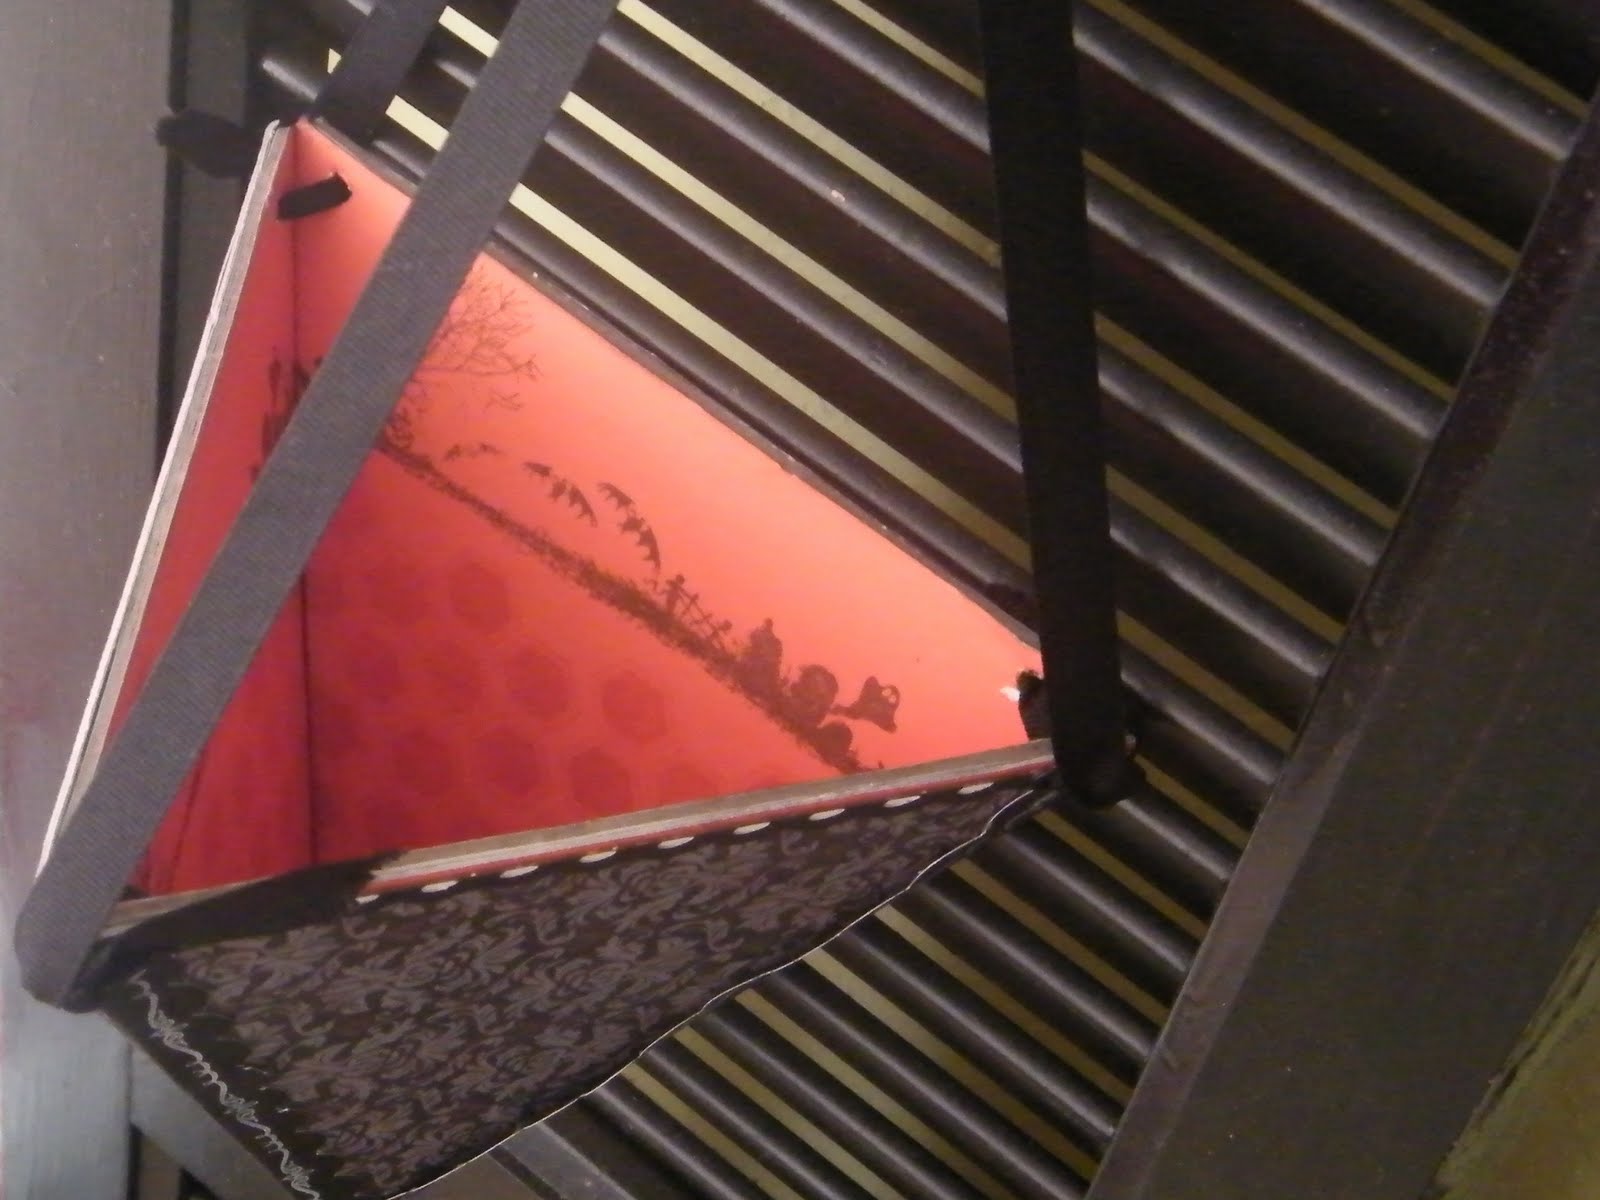
Once I covered the pieces with pattern paper I chose a solid cardstock for the inside. I stamped a spooky Halloween scene from the Captured Moments set to add interest and fun to the inside. So even when your treats are gone, there is still some fun leftover.
Liquid Glass and a cardstock hinged border was perfect to hold the 3 triangles together. Next step was to re-punch the holes in the banner before I assembled it so I could lace my black grosgrain ribbon through.
When I was putting it together I thought how cool it would look with window cutouts.
Here is how it turned out.

Here it is lit up with a battery operated tea light. Isn’t it so pretty?

How I did it
I used my Cricut to cut openings into the paper triangle and used a craft knife to cut through the chipboard banner.
Next, I stamped on vellum with archival ink. Staz On would be perfect. I attached the vellum and added some finishing touches like the border, the ribbon and the flower at the bottom. I used ribbon to make a hinge on the sides to hold them together.
Until Next Time-
Happy Creating!
Sarita
