Welcome to August Stamp of the Month Blog Hop!
If you came here from Tamra’s Blog you are on the right track.
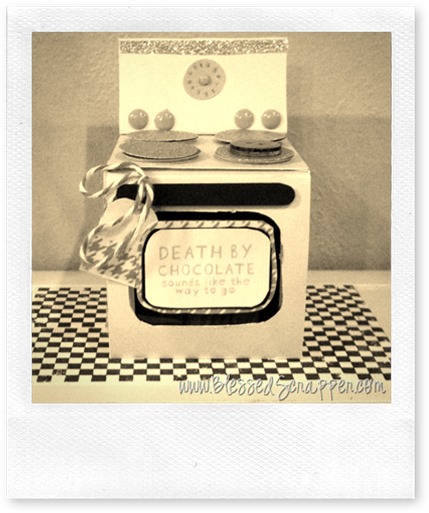
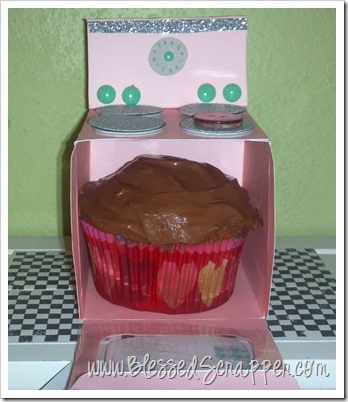
So, when I came across this super cute cupcake box tutorial I knew I had to try it. For the oven I wanted it to look retro.
 Well, maybe not that retro! Here it is in color at least.
The Process
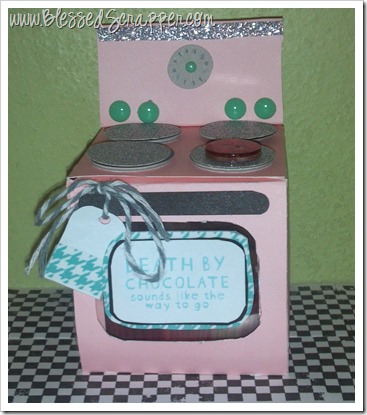
I cut out a box shape using the Cricut Artiste Cartridge (key f). Pink was the perfect color for a retro oven. I turned it on it’s side and added a piece of cardstock to the back for the height it needed.
Temperature Control “knobs”: Aqua dots which are little epoxy embellishments that already have adhesive on the back side.
Little temperature gauge: It is a clock face pattern on Key 8< Accent4 <shift
Red Burner: Red glitter button
Silver Burners: Silver Glitter Paper circles ( I also used foam tape to give them some depth.)
Silver shimmer trim because well, that’s just cute and every girl needs a little shine.
Oven handle: Cut a long skinny oval out of black cardstock.
I stamped “Death by Chocolate-sounds like the way to go” in Lagoon. I used matching Lagoon Houndstooth Washi Tape for the background piece. I also added a little tag that I thought mimicked a kitchen towel.
To bring it all together I had to make a retro floor to display it on.
I used a stamp from Geometric Backgrounds and black ink to make the checkered floor.
“Lovin’ From the Oven” The possibilities are endless.

So, that’s it. Thanks for stopping by. Be sure to Keep hopping over to Kathleen’s Blog for more delicious inspiration.


What a cute pink stove!
So cute!
What a cute project. TFS!
What a cute project. TFS!
Well, shut the front door! This is incredible, Sarita!!!
That's so adorably awesome! Super sweet!
Wow…so cute!!!!
OMG – now that is cute and clever!! I am such a retro girl myself – love the pink and blue…
Oh my word. Are you kidding me? Too Stinkin' cute!!