My Creative Cottage - Connect. Create. Celebrate with Chalk Couture.

  • Facebook
  • Twitter
  • Pinterest
  • Instagram
  • RSS
  • Email

Menu

Skip to content
  • Home
  • Book Your Private Event
  • Shop Supplies
  • Project Gallery
    • Customer Gallery
    • Barn wood
    • Cricut
    • Paper Crafting
  • My Cottage Studio
  • Blog
  • Contact Us
  • Meet Sarita

Halloween Paper Party Decorations Made With the Cricut

9 / 27 / 1210 / 19 / 15

Halloween Paper Party_My Creative Cottage
This was really fun to make with the Cricut® Artiste Collection
 All of the shapes I used to create this paper party can be found on Cricut Artiste Cartridge.  You only need 2 keys: Halloween and Eek. It is so handy!
Cupcake Wrappers

Popcorn ball in cupcake wrapper_Cricut_My Creative Cottage

  • Cut a cupcake wrapper out of your favorite Cricut or svg file.
  • Assemble your wrapper- there will not be a bottom, so no worries there.
  •  Apply a little bit of adhesive to the inside of the wrapper so the popcorn ball stays.
  • Add a small pin holder for a fun little topper.  See? It’s just like a cupcake without all of the mess.
Soda Bottle Wraps
Halloween Bottle Wraps_Cricut_My Creative Cottage
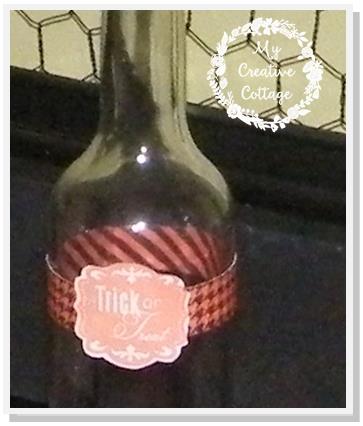
These were super simple.
  • Cut a strip of patterned paper or use a border strip.  Whatever is handy.
  • Wrap it around the bottle and close it in the back with a little bit of adhesive.
  • Stamp on a shape of your choice.
  • Adhere the stamped shape to the strip of paper.
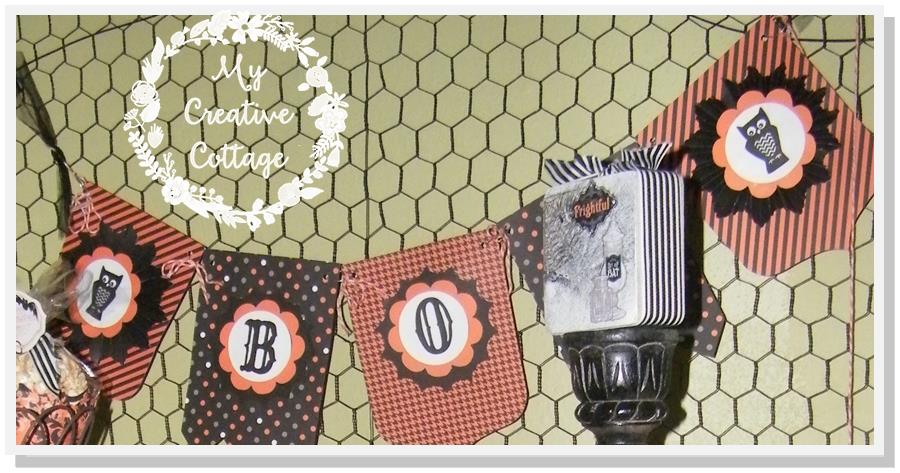
Boo Banner
  •  Cut out shapes and layer pieces.
  • Cut the word BOO out on the Cricut.
  • Stamp images using any Halloween stamp set you have.
  • Punch small holes in the upper right and left hand corners of the banner pieces.
  • Lay your banner pieces on the table.
  • Thread string through the hole and tie it to the next one.  Repeat.
  • Add ribbon to the ends for hanging.
Halloween Banner_party decorations_My Creative Cottage
Black Cat Mini Treat/Gift Bags

Although you can use  jack-o-lanterns, I designed this for a party with”older children.”  So, I was really drawn to the black cat on the cartridge. It’s mysterious and sophisticated (LIKE ME)! Okay, you can stop laughing.  I just think black cats are cool!

Black Cat Halloween mini gift bag_Cricut_My Creative Cottage

My twist on the treat bags…

DSCF5378

This is the shape that is cut out for the banner- super cute!  This is what I had left over. You know I am all about using the scraps!
DSCF5379

So,  here it is as a moon behind the cat.


Halloween_Black cat_Cricut_ My Creative CottageBling it out with a gem add a little tulle and silver shimmer tape. You could also make a little collar out of a tiny scrap of shimmer. You can’t waste it! Plus shimmer tape is adhesive backed so it sticks anywhere.

Some of my favorite embellishments I used:

  •  Silver Shimmer Trim
  •  Black Tulle Ribbon
  •  Black Striped Grosgrain Ribbon
  • Bling Gems
I hope you found some Halloween Party inspiration.
It is a great way to put that Cricut to work!
Don’t miss another project!  Sign up for my newsletter and you’ll get this
great stuff and more delivered right to your inbox.

Until Next Time-

Happy Crafting!

Sarita


Share
  • Pin it
  • Share
  • Tweet
  • Share
  • Email
Share
  • Pin it
  • Share
  • Tweet
  • Share
  • Email

Mini Fall Treat Purse with Cricut Artiste

9 / 26 / 129 / 11 / 15

To celebrate the first day of Fall  I had to make a little somethin’. I do mean a “little something”

Ever since I made the larger version of this purse I have been wanting to make a mini.  So, that’s what I did! It is so cute and irresistible! Seeing it perched up on this spool of ribbon should give you an idea of the size.

mini purse cut with Cricut for fall_My Creative Cottage

So now the hard part, what in the world can I fit in there!  3 little candy corns of course! Some people will really appreciate the thought and the calorie count! These would make such cute little gifties for the bank teller, waitress, cashier.  Put a smile on someone’s face and make one today!

mini cricut purse filled with candy corn_My Creative Cottage I used this adorable owl paper from the Moonlight Paper Pack and it worked out great because the flip side is green- which was perfect for my leaves.   For the badges I grabbed what I had and ended up cutting it half to fit.

Side note: I usually cut a whole page of shapes like this and keep them on hand for stamping.
I used the “Autumn Days” saying from the stamp set, Backdrop-Charmed.

Materials Used:
 Moonlight Paper Pack- (for consultants, this is the bulk Moonlight Paper so it’s makes a great create and take project.)
 Backdrop-Charmed Stamp Set- “Autumn Days”
 Cricut Artiste Cartridge

Shape Page Key Function Size
Purse 32 F 3D Object 4.5
Flower 54 F Accent 2 2.5
Leaf 54 F Accent 4 .5
Badge
(cut in half)
77 Halloween Card 1.75

Enjoy! I would love to see your version of this create and take project. Be sure to post a link in the comment section when you do!
Happy Fall ‘Yall!

Until Next Time-

Be Blessed!

Sarita

Share
  • Pin it
  • Share
  • Tweet
  • Share
  • Email
Share
  • Pin it
  • Share
  • Tweet
  • Share
  • Email

Blue Ribbon Scrapbook Layout w/ CTMH’s Flip Flaps!

9 / 10 / 128 / 10 / 15


I received a really wonderful call last week from a great friend and customer, Annette.  She had a great success and was thanking me. How sweet and thoughtful!
A couple years ago we hosted a Creative Escape Retreat.  We taught some really great ways to add more pictures to a scrapbook layout with our awesome pocket pages.
Recently, she adapted that technique and used it on a super adorable 1st Birthday Layout of her grandson.  So, last week she entered it in the Walworth County Fair and earned a BLUE RIBBON! I was like a proud Mama. My family and I were at the fair a few days later. I was so excited to see it on display and of course I had to take pictures!

                                                                        048

 046

I am so happy for her and truly touched that she thanked me for my help! That’s what it is all about! Helping others succeed! We all have gifts and talents to share. So, what is your talent? Do you share it? How? I would love to know!!

Share
  • Pin it
  • Share
  • Tweet
  • Share
  • Email
Share
  • Pin it
  • Share
  • Tweet
  • Share
  • Email

Fall Favorites Stamp and Gratitude Mailbox

8 / 31 / 129 / 11 / 15

 Fall Gratitude Mailbox

If you have come here from Michelle’s Blog you are on the right path!  This set of 11 is a classic Fall stamp with all of the “Fall Favorites” that you want, need and LOVE!  It’s perfect for journaling, card making and home decor.


There is so much to love about Fall in Wisconsin. Packers Football and pumpkin anything top my list!  So I was eager to make something with this set. I ended up with a home decor piece that should last well into Thanksgiving!

Gratitude Mailbox Made With Cricut_My Creative Cottage

 The idea is to grab a tag from the pocket and write down something a family member did that you are thankful for. When someone walks by it, they will see there is mail and can get a nice surprise.
I cut the mailbox out on the Cricut. I think the little flag that moves it so cute.  It is almost hard to believe it is made out of paper and cardstock.  I gave it a rustic fall look by covering the cardstock with barn wood paper.  Adding a second layer also makes it sturdier.
Open gratitude mailbox with Cricut_My Creative Cottage
I stamped the circle word “Fall” in a consecutive line on a strip of cardstock.  Then I cut it out to create a border. I also used the stamp that coordinated perfectly with the tags. Tags and pocket shape can be found on the Art Philosophy Cricut Cartridge.  You might even have one that will work already.
When I stamped the tags I masked the “fall favorites. That means I covered up the part I didn’t want stamped.    So, just the rest of it would get stamped.  I added little pull tabs with the Clementine paper that I adore.  You could always use ribbon or scraps of fabric or burlap. Whatever tickles your fancy.
I adhered the pocket to the side of the mailbox and added the tags.  You will want to use a stronger adhesive- maybe even a hot glue gun to make sure the pocket stays.
Gratitude Mailbox Made With Cricut 2_My Creative Cottage
I can guarantee a nice thought of thankfulness will put a smile on anyone’s face. My family is very visual so a subtle reminder works well for us!
Over the next couple months as the tags are read we will add them to a burlap ribbon to make a fall Gratitude Banner.  This is sure to become a tradition in our house.  I hope you try it too or pin it for later.
Now, hop on over to Shirley Ross’ Blog for some more Fall inspiration!


Until Next Time-
Be happy, be creative, be blessed.

Sarita


Share
  • Pin it
  • Share
  • Tweet
  • Share
  • Email
Share
  • Pin it
  • Share
  • Tweet
  • Share
  • Email

Purse and Gift Bag With CTMH Cricut Artiste and a Video

8 / 26 / 128 / 10 / 15

We had so much fun at my Open House yesterday. That Cricut Artiste Cartridge is INSANE! Everyone was getting acquainted with it. When you are done watching this video, you’ll understand what I mean. Then  scroll down to see what we made!
We had 2 make and takes. The first purse, I have to give a shout out to my girl, Fancy Melissa because she created this and I just “craft-lifted” It is so cute! 
Look at the inside:
 It can hold a little 3×3 Petite Perks or one of our new Monogram Sets! Love these!  Along with 3×3 cards and envelopes. There are 2 other purses on the cartridge that have inside holder for even larger things.
We also made this little gift bag, I just really adore the stamp sets that come with the collection. Especially the birthday banner. It is so realistic looking with the added details.
We also used the Pirouette Flair Stamp for a gift bag topper. We used the Whisper Pigment Ink and it really made it look embossed and almost velvety.  This was inspired by the one shown on pg. 19 in the catalog.
 
then we all ooohed and aaaahed over the new Shimmer Tape! It is so fun and pretty. I love that you peel the backing off and away you go! It’s hard to see on this photo, but it adds just the right amount of sparkle and shine.
 

Share
  • Pin it
  • Share
  • Tweet
  • Share
  • Email
Share
  • Pin it
  • Share
  • Tweet
  • Share
  • Email

Crafting Under a Chandelier!

8 / 23 / 128 / 10 / 15


So, I have to say, I had never crafted under a chandelier before! This past weekend was amazing! The house was out of this world! Definitely out of our price range. So, it was such a luxury to glance out at the lake and feel some peace. Of course, that was only when we stopped talking long enough! 

Eventually I got around to teaching my girls how to use our newsletters, rock the new Cricut Cartridge, Artiste and get a plan together with all the new workshop options! We made a super cute purse too!

The WI-FI was awesome. We even got it on the 3rd floor.  We had so many rooms to pick from to hang out in!  We were able to sit in this sitting area, relax with our lap tops and learn!  We got to play with the new Studio J Express Collections too!  It was a great team building event!

Plus, it happened to be the perfect place for therapy! These girls were so awesome and we really connected and helped each other.  Which is truly what it is all about!


Joanne made us yummy meals. Who couldn’t in that gorgeous kitchen!?  I just love the little breakfast nook!

 We are so excited to plan our next retreat with our customers!  Would you like to craft in a mansion, sleep in those most luxurious beds and relax in the steam shower, craft the day and night away? Take classes and learn along the way? Then you will want to sign up for our next one.                        
 Keep an eye out for the next date. Like my Facebook Page or sign up for my newsletter!

 See you soon!
Be Blessed!

Share
  • Pin it
  • Share
  • Tweet
  • Share
  • Email
Share
  • Pin it
  • Share
  • Tweet
  • Share
  • Email

The Ultimate Crafting Retreat This Weekend!

8 / 14 / 128 / 10 / 15

So,  I just realized that (GASP!) Not all of you lovelies are on my Facebook Page– CTMH Blessed Scrappers.  So, you may not have heard about this awesome retreat this weekend! We only have a few spots left! So ditch the hubs and the kiddos and join us!!

 At this amazing renovated mansion! We only have a few spots left!
Every August I like to get my team together and play with new products, drool over the new catalog and tell them all the good juicy news I got at convention. It always involves projects, chocolate and food! Last year we made it a slumber party complete with a pancake breakfast!   Although my hubby was gone, we still had the kids running around and it was FUN, but maybe not relaxing!

So, this year my girl Joanne at Scraps in Life happened to mention that we might be able to get this gorgeous mansion on the lake for our retreat! So, now we can relax, recharge and retreat!

You don’t have to be on our team to join us this year! I am warning you though, after this weekend you will want to be (hee hee!) It is still only $49 to sign up and that gorgeous bag is almost gone! Just sayin’!

Ok back to you…
Can you picture yourself here relaxing with a glass of wine?

 Or ditch us all and hang out by the lake with a good book! We won’t be offended!

OR

Play with the new Cricut Cartridge

 Create with the new Studio J Express Collections.

Learn the basics of the Cricut Craft room 

Discover New products- including our NEW alcohol markers 

and………Enjoy the VIEW!

Bring your own projects to work on.  Looks like we will have plenty of space and time to get our crafty on!!

Meals, linens, etc… are all included.  All this for only $100! For the ENTIRE WEEKEND!!
I promise it will be worth it! Prepare to be spoiled and have a ton of fun! Perfect timing before the madness of back to school begins!
Contact me now for more details and to reserve your spot today!

Share
  • Pin it
  • Share
  • Tweet
  • Share
  • Email
Share
  • Pin it
  • Share
  • Tweet
  • Share
  • Email

Baroque Borders Stamp of the Month

8 / 1 / 128 / 10 / 15

Welcome to our stamp of the Month Blog Hop! You are going to see a lot of beautiful things from about 60 talented CTMH consultants. If you came here from Traci’s Blog you are on the right path.  Just hop along from blog to blog and you are certain to find many uses for this stamp, Baroque Borders.  

I chose to make a card. Well actually I have a wedding shower this weekend so I had to.  Anyway, I LOVE the new Cricut Artiste Cartridge as it was quite instrumental in my creation.

 I am looking for my Typewriter Alphabet and i am going to stamp….

All Because Two People Fell in…( Open Card)…

                                                                 LOVE! 
It had to elegant so I really liked the way random stamping the inside chocolate card stock turned out!  It had to be Avonlea, which I am sure you will see a lot of. It is a new paper that I adore. 

Now you are on your way to Haley’s Blog for some more inspiration!  Don’t forget this set is only $5 with a $50 purchase.  Be sure to add it to your order this month.

Share
  • Pin it
  • Share
  • Tweet
  • Share
  • Email
Share
  • Pin it
  • Share
  • Tweet
  • Share
  • Email

Fun and Games Box and Scrapook Layout

7 / 16 / 1210 / 18 / 15

This is a layout that I created with this paper pack and a few other embellishments.

Here is another project.


With a BINGO card paper how could you not make something like this. It’s all about FUN and GAMES!!

Here the box is open and you can see the closure was just a wrap that I made.  In it you can place a deck of cards, a tic tac toe game and anything else you think is FUN and Games. I would probably hide chocolate- no one would look there.

Until Next Time-

Happy Creating!

Sarita

Share
  • Pin it
  • Share
  • Tweet
  • Share
  • Email
Share
  • Pin it
  • Share
  • Tweet
  • Share
  • Email

4th of July Scrapbook Layout and Project Ideas

7 / 12 / 1210 / 14 / 15

Look what you can do with one red, white and blue paper pack.


I created this layout with the Fanfare paper pack…. in Studio J.  However, you could do it with classical scrapping too!

As you can see it is perfect for summer, 4th of July, Military Homecomings and so much more.

We also taught a card class at a retreat with this paper pack. It look so different with the orange background that was created with a spray pen.
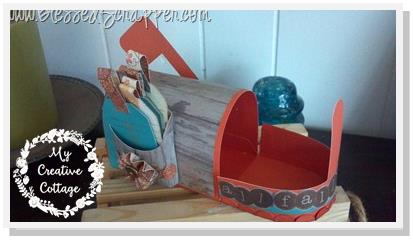
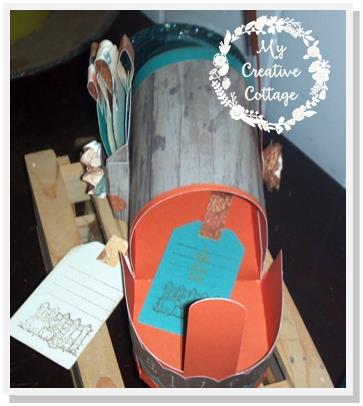
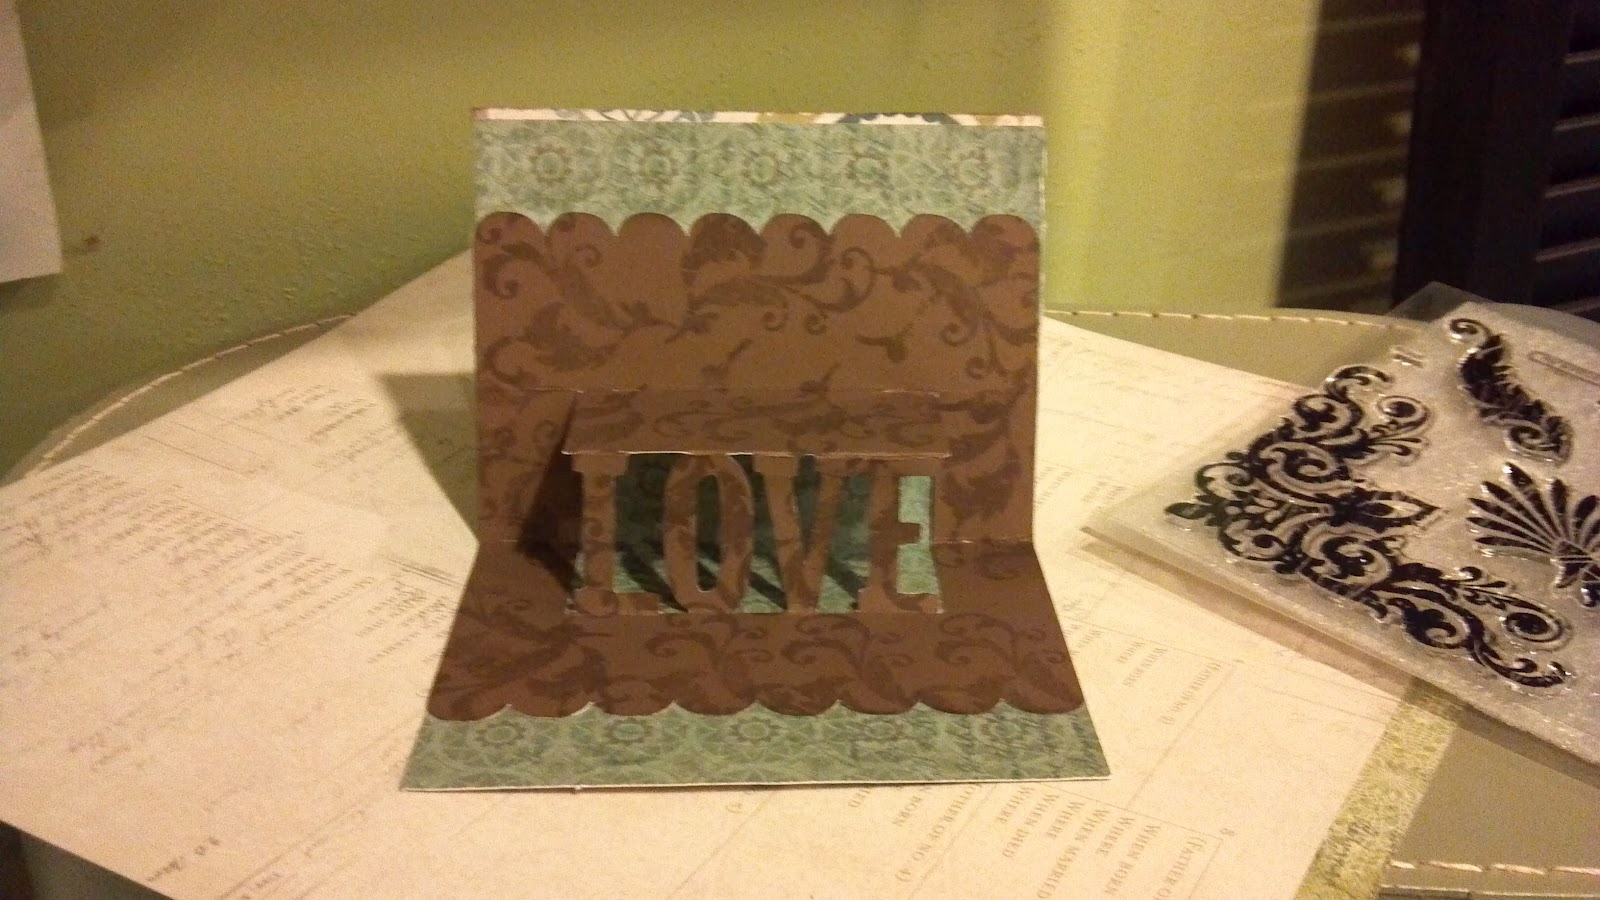
This was a super cute decoration, my team member Trudy made.

Share
  • Pin it
  • Share
  • Tweet
  • Share
  • Email
Share
  • Pin it
  • Share
  • Tweet
  • Share
  • Email

Posts navigation

Previous Page 1 2 … 10 11 12 13 14 … 40 41 Next Page

Hi! It's me, Sarita. A.K.A. Blessed Scrapper. DIY is in my DNA. Life is a constant adventure with a child on the Autism Spectrum and my own AD/HD. I am a life long learner and I love to share with others. So, I hope you'll find something here to inspire you!

Archives

Meta

  • Log in
  • Entries feed
  • Comments feed
  • WordPress.org

Tags

3-D 3x3 cards Anthology autism Autism Awareness Month barn wood Birthday birthday cards birthday craft Blog Hop card Cards Christmas Christmas Craft Class Close to My Heart Cricut Cricut Artiste Cartridge CTMH DIY Easter Fall family life Gift Bag Halloween home decor kids mini album My Creative Cottage paper crafting Party Decorations random stamping scrapbooking scrapbooking layouts scrapbook layout Scrapbook Layouts stamping Stamp of the Month Studio J tags Valentines Vintage Vinyl Wall Art Waterford
Site made with ♥ by Angie Makes
Angie Makes Feminine WordPress Themes
Manage Cookie Consent
To provide the best experiences, we use technologies like cookies to store and/or access device information. Consenting to these technologies will allow us to process data such as browsing behavior or unique IDs on this site. Not consenting or withdrawing consent, may adversely affect certain features and functions.
Functional Always active
The technical storage or access is strictly necessary for the legitimate purpose of enabling the use of a specific service explicitly requested by the subscriber or user, or for the sole purpose of carrying out the transmission of a communication over an electronic communications network.
Preferences
The technical storage or access is necessary for the legitimate purpose of storing preferences that are not requested by the subscriber or user.
Statistics
The technical storage or access that is used exclusively for statistical purposes. The technical storage or access that is used exclusively for anonymous statistical purposes. Without a subpoena, voluntary compliance on the part of your Internet Service Provider, or additional records from a third party, information stored or retrieved for this purpose alone cannot usually be used to identify you.
Marketing
The technical storage or access is required to create user profiles to send advertising, or to track the user on a website or across several websites for similar marketing purposes.
Manage options Manage services Manage {vendor_count} vendors Read more about these purposes
View preferences
{title} {title} {title}