My Creative Cottage - Connect. Create. Celebrate with Chalk Couture.

  • Facebook
  • Twitter
  • Pinterest
  • Instagram
  • RSS
  • Email

Menu

Skip to content
  • Home
  • Book Your Private Event
  • Shop Supplies
  • Project Gallery
    • Customer Gallery
    • Barn wood
    • Cricut
    • Paper Crafting
  • My Cottage Studio
  • Blog
  • Contact Us
  • Meet Sarita

“Illuminate” 6×6 Canvas-Faith Shines Bright

11 / 1 / 138 / 27 / 15

Welcome to our Stamp of the Month Blog Hop!  If you have come here from Tamytha’s Blog, you are on the right path!

This 6×6 canvas would never have gotten done if it weren’t for my handy Cricut.

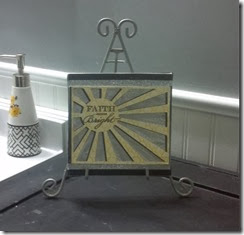
Faith Shines Bright Canvas

Made a 6×6 canvas for my bathroom wall. First step was to paint it with our
Create a Shade Pearl Paint.  I love the pearly finish and it covered perfectly.
2013-10-30_14-38-42_673
  The Process
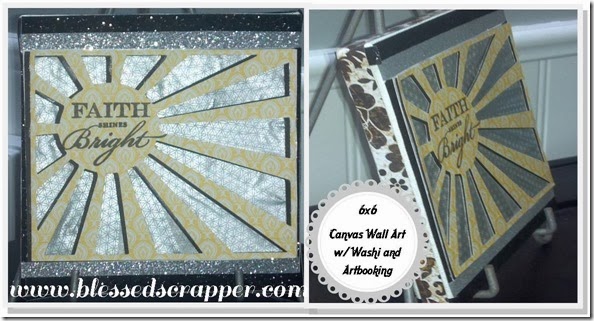
I cut the background overlay from Artbooking.   I used the yellow pattern paper from “Chantilly” for one layer. I then cut an identical piece in black cardstock. to achieve a layered look I offset the 2 a bit.  It is the easiest way to do it, ( I think anyway.)
Then I stamped it with the most gorgeous saying from this set, “Faith Shines Bright”.”
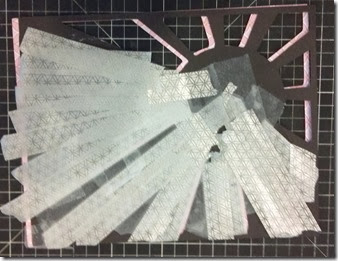
I filled the overlay in with the silver washi tape.  I used regular scotch tape to tack it down. Then I trimmed it and adhered to my canvas.
2013-10-30_15-28-56_948
It looked a little plain so I added the black and silver shimmer trim. Since the trim  has an adhesive back, it worked like a charm. Plus, it lifted easily when I had to reposition it and it didn’t pick up the paint either!
2013-10-31_08-32-07_891
So, for now it is sitting on the cabinet in the bathroom. I am going to make a companion for it too. My girls will see this message daily. I am hoping it will be a good reminder to let their light shine!

Now “Hop” on over to Connie’s Blog to see her work! Be sure to visit all the Consultants at their Blogs to get some great crafting ideas and lots of inspiration.

Until Next Time-

Be Blessed!
Sarita

Share
  • Pin it
  • Share
  • Tweet
  • Share
  • Email
Share
  • Pin it
  • Share
  • Tweet
  • Share
  • Email

New Kids Scrapbooking Class- Express Yourself

10 / 28 / 138 / 10 / 15

  I am thrilled to be offering an Arts and Crafts Class through the Waterford Recreation Department again. This time the focus is on scrapbooking. We will be exploring a no holds barred type of memory keeping using CTMH “My Crush” books.  I LOVE the quality of these books. The pages are made of a thicker printed cardstock that can be stamped on, drawn on, glued on and it won’t bleed through.  Plus they are in a wire bound book that is a great size at 10” x 7”. We will start with basic journaling prompts and the students can be as creative as they want with the subject.  There is no right or wrong way.    Graphic for Class Each child will receive a My Crush Book and a package of embellishments. Over the 5 week session (we will not meet on Thanksgiving) the student will add to their story and tell it how they see fit.  As the instructor I am there to get their creative juices flowing with different art media, lots of ideas and tons of motivation! Here are the details: Grades 3-6 (boys and girls welcome)
Thursday Classes (right after school) 3:45-4:45 p.m.
Fee: 25.00 includes ALL supplies (your scrapbook and clip art)
Bring: 5-6 personal photos for your scrapbook
Evergreen School in the Art Room #36
Instructor: Sarita Schraeder The first session coming up is Nov.7- Dec. 12.  I hope your child will join us! Click here to register and to see upcoming sessions. Until Next Time- Capture Life! Sarita  
Share
  • Pin it
  • Share
  • Tweet
  • Share
  • Email
Share
  • Pin it
  • Share
  • Tweet
  • Share
  • Email

CTMH Blog Hop October Scandinavian Wishes- Peace, Love, Joy and Hope Card for Christmas

10 / 1 / 138 / 27 / 15

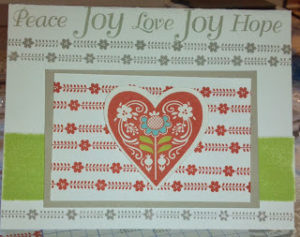
Peace, Love, Joy Christmas Card

If you came here from NIKKA’S BLOG you are on the right path.
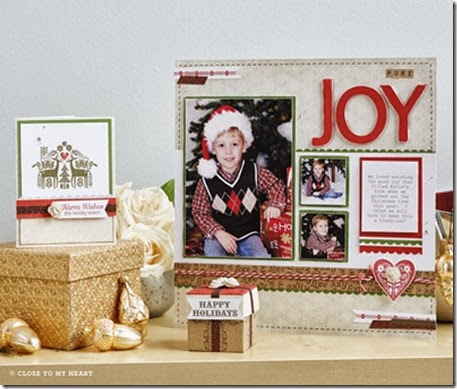
Here is some adorable artwork that our art department at CTMH created:
1013_SOM

And here is a simple card that I created.

Scandinavian Wishes

Keep hopping on over to WANDA’S BLOG to see what she has imagined and everyone else along the way!
Enjoy!
Until Next Time
Sarita

Share
  • Pin it
  • Share
  • Tweet
  • Share
  • Email
Share
  • Pin it
  • Share
  • Tweet
  • Share
  • Email

CTMH Reflections Patterns Meet Artbooking Video

9 / 13 / 138 / 27 / 15

See your paper scraps in a whole new way!

This to me is so exciting! I was working on a layout the other day and I had a revelation! Did you realize how the Artbooking overlays are very similar to our Reflections Book patterns?

Well, I talk faster than I write so I made a short 5 min. video. I hope it makes sense and you are inspired to see your scraps in a new way!


Share
  • Pin it
  • Share
  • Tweet
  • Share
  • Email
Share
  • Pin it
  • Share
  • Tweet
  • Share
  • Email

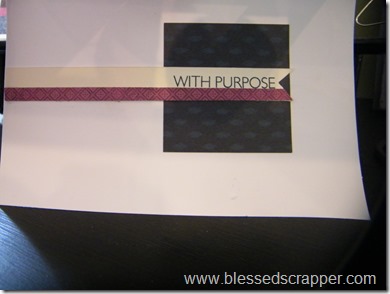
“Live With Purpose” Sarita Circle Spin Card

8 / 28 / 138 / 10 / 15


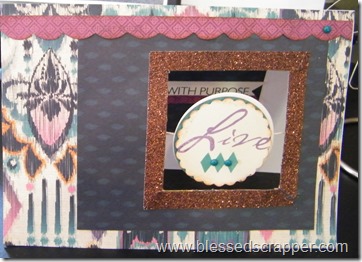
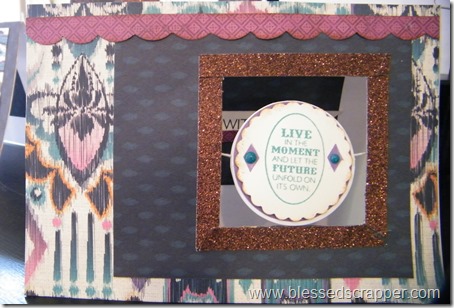
Our new Circle Spin Card Bases are all sort of fun.  All the work is done for you with this 5×7 card base.  All you have to do is decorate!
I made this one as a card of encouragement. It is meant for someone who needs a reminder that what they do matters. To not worry and let things fall into place as God planned.
FUNNY! I would give myself this card today. It’s a message that is my mantra, but I so quickly forget!  If I stick with living a life with purpose, everything else will fall into place.
That’s why I love this stamp set. It was included in my Sarita bundle. I immediately thought of Katrina. She did live in the moment.

To make stamping easier, I cut apart the Live and With Purpose. Try doing that with a rubber stamp! Winking smile
So, here is my card for me.. and maybe you too! 
DSCF5797

Focal point is a die-cut circle that spins! So, you can have 2 sentiments in one card.

DSCF5802

I used the bronze shimmer tape cut at an angle to frame out the window. It also hid my rough edges.DSCF5805

Here’s the inside. Pretty simple.
Dying to know what I used and how to get it? Here ya go!
Stamp Set: C1565 In the Moment

Paper:  X7171B Sarita
Circle Spin Card Bases and Envelopes: Z1866
Accessories: Z1849 Bronze Shimmer Trim and Aqua Dots
Ink: Gypsy and Twilight
                 

Until Next Time!
Capture Life!
Sarita

Share
  • Pin it
  • Share
  • Tweet
  • Share
  • Email
Share
  • Pin it
  • Share
  • Tweet
  • Share
  • Email

DIY- Antique Hutch Redo With Homemade Chalk Paint Recipe

8 / 23 / 138 / 10 / 15

 We took a plain antique hutch that was begging for some love and transformed it with a Homemade Chalk Paint Recipe.  I was so impressed at how easily it went on.  No need for primer PLUS! it dries incredibly fast. It also does not chip.   
Antique Hutch Redo

What kind of friend shows up for a visit from miles away with paint brushes, Plaster of Paris, and paint clothes?
DSCF5792
 The very BEST kind of friend! My uber talented and crafty girl Trudy! Ever since she discovered how to make her own chalk paint on Pinterest that’s all I have heard about!  I happened to have a piece that needed some love! We always wanted to redo it, but never got around to it before she abandoned me moved to Michigan last summer.
So, when she got here and started raiding my paint shelf, I knew I was in for some trouble! FUN!
clip_image002

Sidebar: I got this piece from a sweet lady who came to my scrapbook rummage a couple summers ago.  She insisted she had the perfect piece for my cottage and I had to come and see it.  So, Scott and I went over there and she gave this to us for FREE!
I always knew I wanted to do something with it. THEN the other day I was searching high and low for my hot glue gun that I KNEW I had put away in an organized manner. After many failed attempts to locate it, I bought a new one.
And you guessed it…I brought it home and then lo and behold, I found my others.  In the black wooden caddy in this hutch. It was too dark in there and things got lost literally! 


So, I knew the inside had to be painted, but it was a piece of warped board on the back.


DSCF5783
In walks the electrician.. HA! Handy Hubby replaced the back with a piece of wainscoting that we had left over from the bathroom project.  It worked perfectly!  He also removed the drawer- the GOD FORSAKEN heavy drawer that I could NEVER open and close without some choice words- yep, that happens here too!

In place of the drawer he added a board for a shelf. PERFECT!!

Trudy 1
                          DSCF5790

Sofie babysat Zowe and set up her own art station.  Trudy got to work with her tried and true recipe for homemade Chalk Paint. (Not chalkboard paint).  It is made with plaster of paris, covers beautifully and lasts forever. NO SANDING REQUIRED! That is what made us giddy! Also, finding these cool containers to mix in. PLUS they have a lid. PERFECT!!
2013-08-22_11-01-22_383
Here is Trudy’s Chalk Paint Recipe:
2 C. flat latex paint
2 Tbs Plaster of Paris
2 Tbs Water

Step 1.  Mix the Plaster of Paris and water together until you have a creamy mixture.
Step 2.  Add that mixture to the paint. Stir with a paint stick. 
Step 3.  Paint with a brush as usual.
Step 4.  When it is dry, apply a wax finish using a disposable chip brush.
Step 5.  Buff the wax with a clean white rag or old t-shirt.

The paint color we picked was left over from our powder room redo.  I wanted to add a pop of color and love the brightness of this photo below.

 My color inspiration came from this picture I found on Pinterest.
Every house should have a craft room. Love the bright colors!

So, here is the finished project!

DSCF5796

I LOVE it! It makes me so happy every time I walk into my cottage! It reminds me of my best friend and makes me smile. I can’t wait for her to come back and see what else we can chalk paint or other trouble we can muster up!
Until Then-
Capture Life!
Sarita

Blogger Labels: Antique,Hutch,Redo,Homemade,Chalk,Paint,Recipe, Pinterest,shelf,scrapbook,cottage,mixture,furniture,room,inspiration,LOVE,Capture,Life,Sarita,drawer
Share
  • Pin it
  • Share
  • Tweet
  • Share
  • Email
Share
  • Pin it
  • Share
  • Tweet
  • Share
  • Email

How to Make a Cupcake Box That Looks Like a Retro Oven

8 / 1 / 138 / 27 / 15

Welcome to August Stamp of the Month Blog Hop!

If you came here from Tamra’s Blog you are on the right track.

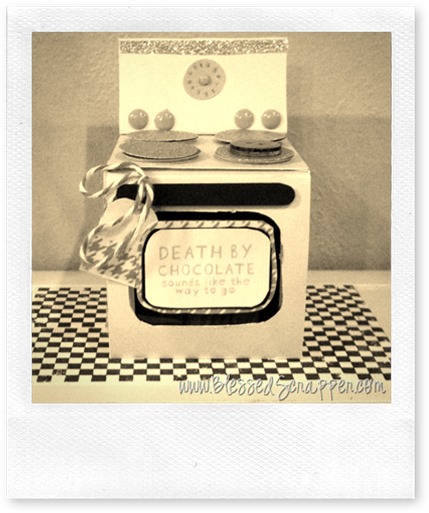
So, when I came across this super cute cupcake box tutorial I knew I had to try it.   For the oven I wanted it to look retro.
2013-07-31_18-29-44_970Well, maybe not that retro!  Here it is in color at least.

The Process

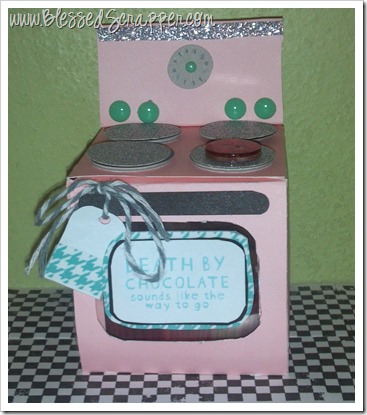
I cut out a box shape using the Cricut Artiste Cartridge (key f). Pink was the perfect color for a retro oven. I turned it on it’s side and added a piece of cardstock to the back for the height it needed.

2013-07-31_18-36-18_238


Temperature Control “knobs”: Aqua dots which are little epoxy embellishments that already have adhesive on the back side.

Little temperature gauge: It is a clock face pattern on Key 8< Accent4 <shift

Red Burner: Red glitter button

 Silver Burners: Silver Glitter Paper circles  ( I also used foam tape to give them some depth.)

Silver shimmer trim because well, that’s just cute and every girl needs a little shine.

Oven handle: Cut a long skinny oval out of black cardstock.

I stamped “Death by Chocolate-sounds like the way to go” in Lagoon.  I used matching Lagoon Houndstooth Washi Tape for the background piece. I also added a little tag that I thought mimicked a kitchen towel.

To bring it all together I had to make a retro floor to display it on.

I used a stamp from Geometric Backgrounds and black ink to make the checkered floor.

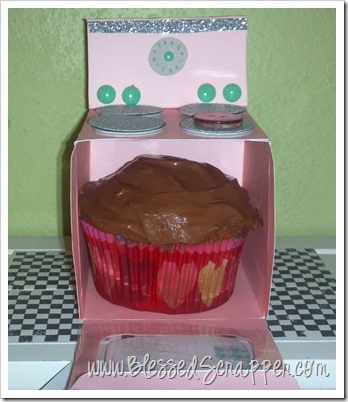
Now the best part is when you open the oven. Wouldn’t this brighten anyone’s day? You could use it for birthday, or announcing a “bun in the oven” or
“Lovin’ From the Oven”  The possibilities are endless.

2013-07-31_18-30-28_793
So, that’s it.  Thanks for stopping by. Be sure to Keep hopping over to Kathleen’s Blog for more delicious inspiration.

Until Next Time-
Be Blesed!
Sarita

Share
  • Pin it
  • Share
  • Tweet
  • Share
  • Email
Share
  • Pin it
  • Share
  • Tweet
  • Share
  • Email

CTMH Canvas Kit and a Mini Canvas Project!

7 / 31 / 138 / 10 / 15

So, it is the LAST day to order your wall art canvas kit for only $19.95! Regular price: $39.95 SO CUTE!!! G1062 Workshop on the Go Canvas Art Kit   Here is my art. I made this following the directions that were included. I still have to get one more picture printed OR I might add an inspirational quote.  Since this was close to a miracle getting a shot like this!   2013-07-31_07-03-13_99 I had a lot of materials left over, since you have a choice of color schemes.  When I saw the gold and green, well, can you guess what my mind went to immediately? The Packers of course! So I grabbed a 6×6 canvas to make mini wall art.  I applied ink directly to the canvas in an “Ombre” fashion. Then used the leftover bits and pieces to embellish it. I really love the way it turned out!! Better yet, I love that I captured this moment and it’s on display. Sofie loves looking at it and so do I. That’s what it’s all about.   2013-07-31_07-04-03_338   Now that the kit is 50% off it’s your turn! Click here to get yours! Add the mini canvas for only $4.95.  I would love to see what you capture! Be sure to share it on my Facebook Page! Until Next Time- Capture Life! Sarita
Share
  • Pin it
  • Share
  • Tweet
  • Share
  • Email
Share
  • Pin it
  • Share
  • Tweet
  • Share
  • Email

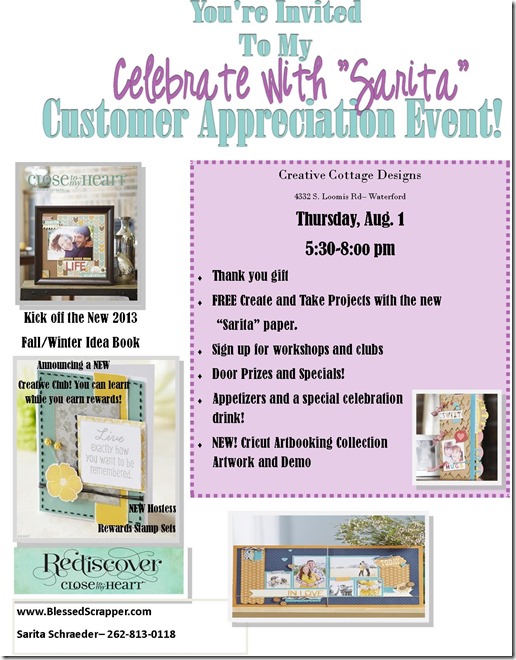
Celebrate with Sarita! CTMH Open House and Customer Appreciation Event.

7 / 29 / 138 / 10 / 15

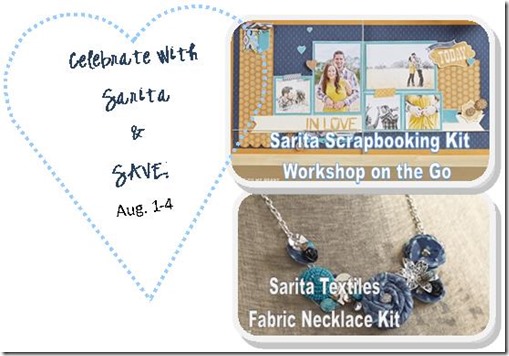
  A celebration and a special!! My way of saying thanks. Without YOU I wouldn’t be here! So, here’s to You!! Some of you have been with me since Leaving Prints days!  That means YEARS of letting me serve you.  Whether I have known you for years or days, you all play such a special role in my life!  You have always kept me going and encouraging me, no matter what was getting in my way! I could never say thank you enough! So, at least I will try…     Celebrate with Sarita PlUS! An Exclusive Sarita Special! Starts Aug. `1st Celebrate Sarita Enjoy a 20% DISCOUNT on all CTMH “Sarita” products from Aug. 1-4. All items will be online August 1st.  Be sure to go to www.sarita.ctmh.com to view the catalog.  I know you are going to love it all! X7171B Sarita Paper Packet X7171C Sarita My Stickease Z1873   Sarita Assortment Sarita Stamps: C1565   In the Moment C1561   One-Way Borders G1066   Workshops on the Go Sarita Scrapbooking Kit and Z1905      Fabric Necklace Kit (made with Sarita textiles) Place your order directly through me to receive  a special 20% discount!!! Until Then- Capture Life!
Share
  • Pin it
  • Share
  • Tweet
  • Share
  • Email
Share
  • Pin it
  • Share
  • Tweet
  • Share
  • Email

First Birthday Invitation- Red Wagon Style with the Cricut

7 / 18 / 132 / 5 / 18

 
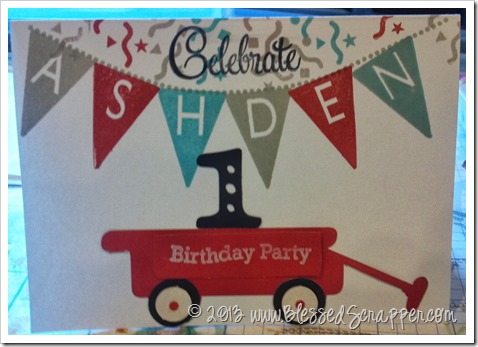
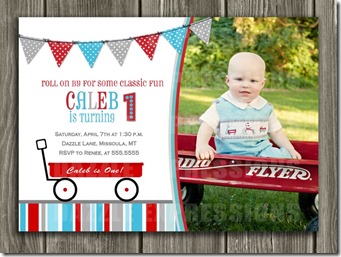
Today is my God Son’s First Birthday! I was honored to make his invitations.  If you follow me on Instagram, you may have already seen it. But I am so excited, I have to show you here too.
First, the inspiration from Dazzle Expressions. Found on Pinterest. His mom, Kira had a whole board with ideas for this theme. So, it made my job easier.
585c2e5e4be88b98feb0368c2a4e9016
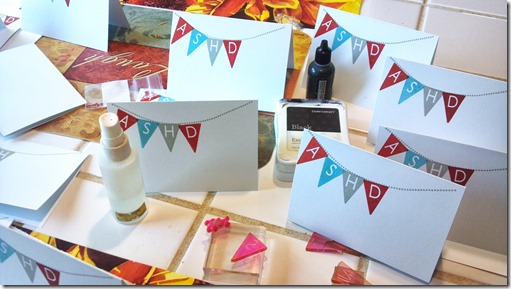
I could have bought a bunch of digi art, but I wanted to make sure these were extra special.  Then I remembered my CTMH fabulous pennant alphabet.
Because they are individual pennant stamps and clear I was able to lay them out to make sure his name would fit! PERFECT!
2013-06-14_09-13-22_795
Here is the finished product.

2013-06-13_18-02-18_562
I think it was exactly what she wanted. Since, when I delivered them to her, I got a great big hug and she got teary eyed.

Supplies Used:
Cricut Cartridges:
Create a Critter- Wagon die cut
CTMH Art Philosophy Cartridge- Number 1 and black tires

Stamps:
CTMH Party Pennants string, Birthday Party and confetti
CTMH Party Set that comes with the Art Philosophy Cartridge- The word “celebrate”
CTMH E1018 Party Pennant Alphabet

Inks:
Crystal Blue
Whisper

Cranberry

(White) Wheels where left over chipboard circles I had kept.  Remember when I made that organizer? You can click here to read that post in case you missed it. I never would have saved them or found them otherwise.
Thanks for looking! I’ll be back to show you the decorations tomorrow!! I used the NEW Artbooking cartridge for the banner.  Let me tell you, the font is worth the price of admission alone!!  I am in LOVE!!!
I gotta go, but if you are drooling over that pennant set, you really should go get it.
Go now! Click here to shop and have it delivered right to your door!

Until Next Time-
Be Blessed!
Sarita


Share
  • Pin it
  • Share
  • Tweet
  • Share
  • Email
Share
  • Pin it
  • Share
  • Tweet
  • Share
  • Email

Posts navigation

Previous Page 1 2 … 6 7 8 9 10 … 40 41 Next Page

Hi! It's me, Sarita. A.K.A. Blessed Scrapper. DIY is in my DNA. Life is a constant adventure with a child on the Autism Spectrum and my own AD/HD. I am a life long learner and I love to share with others. So, I hope you'll find something here to inspire you!

Archives

Meta

  • Log in
  • Entries feed
  • Comments feed
  • WordPress.org

Tags

3-D 3x3 cards Anthology autism Autism Awareness Month barn wood Birthday birthday cards birthday craft Blog Hop card Cards Christmas Christmas Craft Class Close to My Heart Cricut Cricut Artiste Cartridge CTMH DIY Easter Fall family life Gift Bag Halloween home decor kids mini album My Creative Cottage paper crafting Party Decorations random stamping scrapbooking scrapbooking layouts scrapbook layout Scrapbook Layouts stamping Stamp of the Month Studio J tags Valentines Vintage Vinyl Wall Art Waterford
Site made with ♥ by Angie Makes
Angie Makes Feminine WordPress Themes
Manage Cookie Consent
To provide the best experiences, we use technologies like cookies to store and/or access device information. Consenting to these technologies will allow us to process data such as browsing behavior or unique IDs on this site. Not consenting or withdrawing consent, may adversely affect certain features and functions.
Functional Always active
The technical storage or access is strictly necessary for the legitimate purpose of enabling the use of a specific service explicitly requested by the subscriber or user, or for the sole purpose of carrying out the transmission of a communication over an electronic communications network.
Preferences
The technical storage or access is necessary for the legitimate purpose of storing preferences that are not requested by the subscriber or user.
Statistics
The technical storage or access that is used exclusively for statistical purposes. The technical storage or access that is used exclusively for anonymous statistical purposes. Without a subpoena, voluntary compliance on the part of your Internet Service Provider, or additional records from a third party, information stored or retrieved for this purpose alone cannot usually be used to identify you.
Marketing
The technical storage or access is required to create user profiles to send advertising, or to track the user on a website or across several websites for similar marketing purposes.
Manage options Manage services Manage {vendor_count} vendors Read more about these purposes
View preferences
{title} {title} {title}