My Creative Cottage - Connect. Create. Celebrate with Chalk Couture.

  • Facebook
  • Twitter
  • Pinterest
  • Instagram
  • RSS
  • Email

Menu

Skip to content
  • Home
  • Book Your Private Event
  • Shop Supplies
  • Project Gallery
    • Customer Gallery
    • Barn wood
    • Cricut
    • Paper Crafting
  • My Cottage Studio
  • Blog
  • Contact Us
  • Meet Sarita

11 Quick Tips for Digital Scrapbooking and 8 Scrapbook Layouts

11 / 10 / 109 / 11 / 15

I am loving digital scrapbooking!  I was able to create these pages in very little time. I am out  to have fun and try things I wouldn’t DARE do in classic scrapbooking or maybe I would.  I encourage you to play too!  As more of you, my brave customers and readers, are trying this fun and fabulous program I thought it would be fun to share what I have recently discovered.
3 Tips to Encourage You

#1 YOU CAN’T BREAK IT!  Go ahead and try different things.  Your layout is “automagically” being saved as you work on it, so even if your computer acts up during the process, you don’t have to worry about it being lost.

#2 There is an UNDO button. Life doesn’t have one, but this does!! Isn’t that great?  Talk about FREEDOM.  So, go ahead and try it. You dont’ have to worry about ruining a piece of paper or photo because you cut it wrong or laying down a sticker you can’t move.

#3 HELP is always there.  I love the HELP button. I use it often and with the great tutorials with pictures it is easy to use! You can find it in the upper right hand corner.

             You can click on any layout to see more of the details.

 Tip #4. Split a Photo
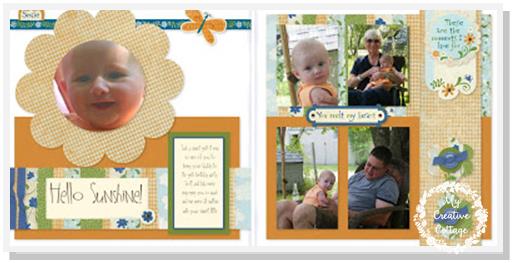
Baby scrapbook layout with digital scrapbooking_My Creative Cottage
 Template: Crystal Ball Paper Kit Used: Splendor

Tip: To get the split image photo simply drag the same photo into both photo wells.  Once in the well it can be moved to make it into one photo with a split.  It’s just kind of a cool thing you can do that I just stumbled upon. If you look at the journaling, you will notice a word is missing at the end, “smile”. I am going to stamp my own word and add it when I get my layouts.  I’ll let you know how it goes.

      Tip #5. Layering Stickers

ayering stickers in a digital scrapbook layout_My Creative Cottage

Tip:  It is so fun to layer and cluster your stickers. It is easily attained by draggin your sticker over and then right clicking and choosing options like “move forward”, “send back” This allows you add brads to centers of flowers and so much more.  Here I just sent my stems to the back and one of my flowers to the front.
      Tip #6 Add a Text Box Over Photo 
Tip #7 Sepia Picture

Digital scrapbook layout with sepia tone picture_My Creative Cottage

Tip: Here I used my most favorite technique and that is adding a text box on top of my photo.  All you have to remember is that you can add a text box like this anywhere and it will show through as long as you click “none” for the background of the text box. I also filtered the one picture in sepia. You can see I used the same picture twice. Once from far away in color and once zoomed in and changed to sepia.  These changes are EASY to make as you go along and are inspired to try it.  GO FOR IT! 
#8 Shorten Your 12″ Border
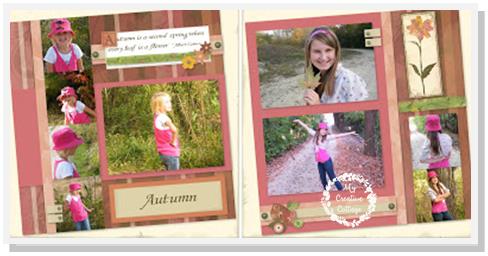
Digital scrapbook layout of sisters and fall_My Creative Cottage
Pattern:Out of the Hat
Paper Kit Used: Olivia
Tip: Here I used the border strip in two locations. Once to fill in empty space in my journaling box. Simply drag your sticker over, then grab the arrow and shrink it. I also used it in between the 2 photos and the sticker artwork on the right hand side.
I also used just the letter A to start my quote and draw attention to it.
#9 Use a Sticker With Your Journaling
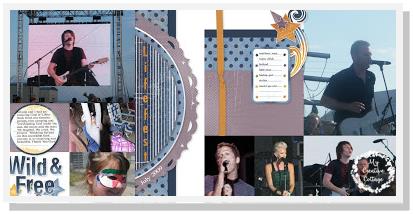
Digital scrapbook layout of concert_My Creative Cottage
Pattern used: Birds Eye View- further customized by rotating the left hand side of the layout. Paper kit used: You Rock

Tip: Here I used 2 different stickers for journaling that had lines. I dragged and dropped the stickers where I wanted them and then I added text boxes over them.  Again, I made sure the box had no background. I was able to see where the words lined up or resize or adjust font size to make it work. It may not be perfect, but it worked.

#10 CHANGE THE COLOR OF YOUR PAPER
Digital scrapbook layout of back to school_My Creative Cottage
Template: Monologue
Paper kit used: Class Act
Tip: YES! that is what I said.  You can change the color of the paper to match your photos.  Here, the original crossword puzzle paper is white and black. I wanted to add more color and chose blue to bring out the colors in Savana’s blue hat.  So, I colored that paper Dutch Blue and then of course you can color your buttons too.  So I chose Cotton Candy to match Sofie’s outfit.  Isn’t that just a GREAT way to customize?
#11 Use the Same Picture Twice
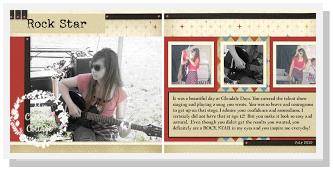
Digital scrapbook layout using the same picture_guitar playing_My Creative Cottage
Pattern used: Powerful Trio
Paper kit used: Zippidee

Here I used the same picture twice.  Once in the large photo well and then again on the right hand side.

First time I edited and used the color saturation option which took out most of the color in the layout but left the brighter colors of her clothes. I LOVED the way it turned out.  Then, the second time once I had the photo in the well, I zoomed in on just her hand on the guitar strings and for added insterest I color saturated again and then made that black and white.  It gave it a very different vibe.

I hope you have enjoyed these tips and layouts.  I would love to see what you are creating these days! Be sure to leave me a comment and a link!

Until Next Time-

Be Blessed!

Sarita
Share
  • Pin it
  • Share
  • Tweet
  • Share
  • Email
Share
  • Pin it
  • Share
  • Tweet
  • Share
  • Email

November Blog Hop- A Little Thanks Gift Mini Pizza Box

11 / 1 / 109 / 11 / 15

It is incredibly hard to believe that it is Nov. 1st already. This is my most favorite time of the year, filled with gratitude and reflection on our many blessings.

If you have come here from Nancy’s Blog, you are on the right path! This is simple to do – just click on the link at the end of the post on each blog to move to the next one! Here we go!

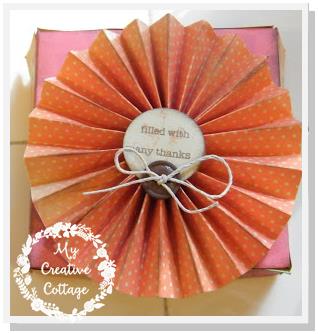
Mini pizza box with a rosette_My Creative Cottage
Filled with stamped sentiments for a special card maker.

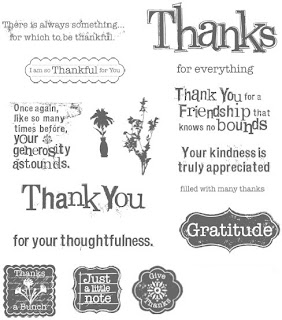
I made a very simple pizza box.  You could easily use your Cricut or Silhouette for the box and the rosette.  I filled it with all sorts of stamped sentiments from the Thanks stamp set. You could even add 3×3 cards and envelopes to create a complete card kit.

It is a great gift for any card maker.  I used the sunset polka dot paper from Olivia and made a fun little flower on the top.  It is simple and fun and would make a great hostess gift too.

You could use any stamp that had sentiments on it and for any occasion.  I hope you are inspired to make your own.

Now you are on your way to Chris’ Blog to see what fabulous creation she has cooked up! Thanks for stopping by and keep on hopping!

Until Next Time-

Be Blessed!

Sarita

Share
  • Pin it
  • Share
  • Tweet
  • Share
  • Email
Share
  • Pin it
  • Share
  • Tweet
  • Share
  • Email

CTMH Christmas Card Workshop

10 / 25 / 109 / 9 / 15

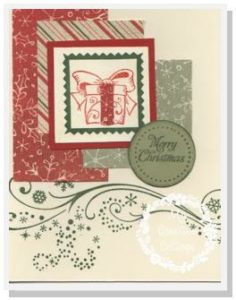
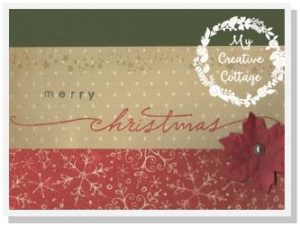
I have finished my first round of Christmas card classes. It was so fun creating this class and using the Wishes How to Cardmaking book made it easy too! I chose the “Just Because Workshop” in the book and picked out my color combo. Using the Mistletoe paper was a no brainer, but I also need another neutral. So, I added in desert sand. I found the star paper from Zippidee to fit in perfectly.  From there it was choosing stamps, sentiments and embellishments.  I used Close to my Heart stamps at the time, but really you could use whatever you have on hand.
Card made with Tage the Ocassion and Mistletoe Paper_My Creative Cottage
B1362 Tag the Ocassion, Snow Flurries and Mistletoe Paper
Card made with Amore, Snowflurries and Peace on Earth Stamp Sets
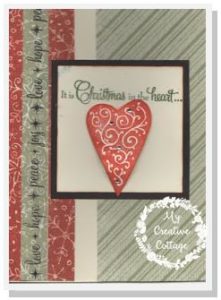
       Christmas in the Heart
Card made with Life's Framework and Holiday Jingle_My Creative Cottage
C1371 Holiday Jingle and Life’s Framework
I love how this looks like an apron.  I scalloped strips of paper and it looks like ruffles.
 
Card made with Holiday Jingle and Holiday Commentary_My Creative Cottage
Merry Christmas Card with Pointsettia

Merry Christmas Card with Pointsettia

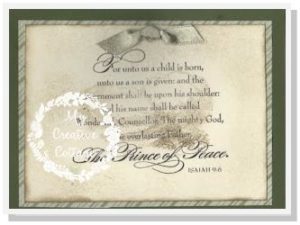
Prince of Peace card made with Baby Jesus and Everlasting_My Creative Cottage
               Prince of Peace Baby Jesus Card

I did layered stamping here. I first stamped the baby Jesus for the background. I did 2nd generation stamping to make it look almost like a watermark.  Then I stamped the gorgeous Bible verse from the Everlasting set with black Staz On ink.  I think I could give this card every year. It is my absolute favorite!

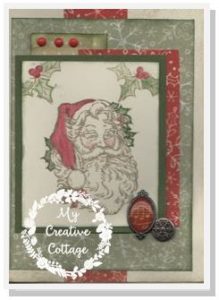
Card made with vintage St. Nick_My Creative Cottage_Blessed Scrapper
Victorian Era Santa Claus. B1356 St. Nick


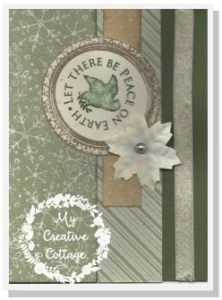
Let there be Peace on Earth Card made with Just for the Holidays and Life's Framework_ My Creative Cottage_Blessed Scrapper
D1380 Just for the Holidays and Life’s Framework
Noel Card with Pointsettia using Just for the Holidays set_My Creative Cottage_Blessed Scrapper
        D1380 Just for the Holidays 
Merry Christmas Card made with St. Nick_MyCreativeCottage_Blessed Scrapper
                 D1380 Just for the Holidays and St. Nick


Joy Card made with Holiday Jingle_My Creative Cottage_Blessed Scrapper
C1371 Holiday Jingle and D1384 Snow Flurries

I hope this has inspired you to create a handmade card or two this holiday season. I would love for you to leave a comment telling me your favorite one.

Until Next Time-

Be Blessed!

Sarita


Share
  • Pin it
  • Share
  • Tweet
  • Share
  • Email
Share
  • Pin it
  • Share
  • Tweet
  • Share
  • Email

Thank You Blessed Scrappers!

10 / 21 / 1010 / 13 / 15

The best part of my job is the people I get the pleasure to know. A couple weeks ago our Blessed Scrappers group hosted a small no frills crop at my church.  The only entrance fee was a food donation to the pantry.  They were so generous.  They didn’t bring a single can, they brought bags of food.  We only had about 16 people attend, but we made a BIG impact and it was very much appreciated.  I opened my mail box to find this card yesterday.


Here’s the thing. We don’t live in the inner city which is usually associated with a food pantry and poverty. We live in a suburb where “everyday America” lives.  To realize that we are serving that many families in our area really hit me hard. Hunger is no longer for those in the city, it can be your neighbor and you may not even know.  I challenge everyone to find a way to help feed the hungry in your area.

 “I am only one, but I am one. I cannot do everything, but I can do something. And I will not let what I cannot do interfere with what I can do.” ~Edward Everett Hale

Blessings-
Sarita


Share
  • Pin it
  • Share
  • Tweet
  • Share
  • Email
Share
  • Pin it
  • Share
  • Tweet
  • Share
  • Email

Share some Christmas Magic with CTMH Oct. Stamp of the Month.

10 / 1 / 1010 / 13 / 15

It is incredibly hard to believe that it is Oct. 1st already and the Holiday craft season is upon us. If you are thinking about making your own Christmas cards and need some inspiration you have come to the right spot!

If you have come here from Traci’s Blog, you are on the right path!  This is simple to do – just click on the link at the end of the post on each blog to move to the next one! Here we go!
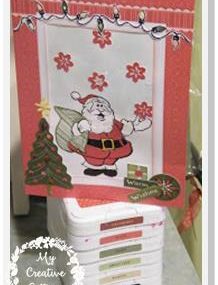
Santa Card_Share the Magic_My Creative Cottage

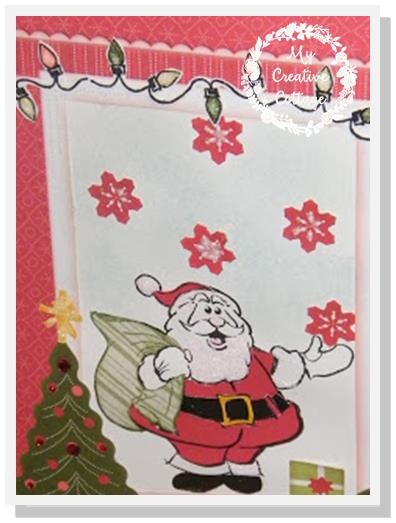
Santa Card Close Up_ Share the Magic_My Creative Cottage

I chose to use the stamp set , Share the Magic” with our new My Originals Festive Memories Card Kit. Although it is designed to slide a photo into the front opening I thought a stamped image would be super cute too. So I stamped Mr. Claus on a white daisy cardstock and did some paper piecing with Mistletoe papers.  Then I adhered him to the window of the card.Then I added the stickers and the blingy tulip sparkles that also come with the kit. If you click on the picture for a better view you can see that I used our awesome Glitz Stardust Glitter Glue to accent Santa’s beard, the lights and the snowflakes. It really adds to the dimension of this card.

As you can see there are lots of images to have fun with!

Aren’t you excited to see what everyone else made?  Don’t stop now!  “Hop” on over to

Judy’s Blog to see her work! Be sure to visit all the Consultants at their Blogs to get some great crafting ideas and other fun ideas!
Happy Holiday Crafting!
Sarita

Share
  • Pin it
  • Share
  • Tweet
  • Share
  • Email
Share
  • Pin it
  • Share
  • Tweet
  • Share
  • Email

Super Simple and Inexpensive Halloween Treat Bags

9 / 28 / 1010 / 13 / 15

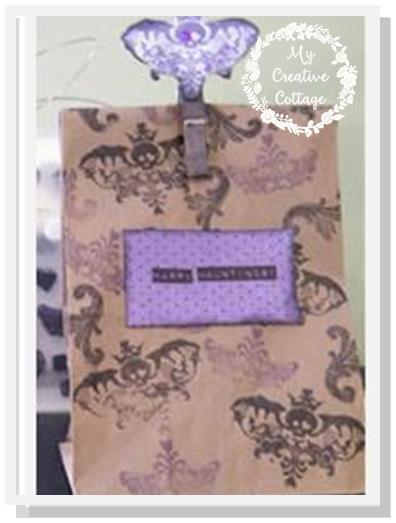
It doesn’t get easier than this. You most likely have these items laying around the house. Clothespins and paper lunch bags.  All I did was stamp them and added an inked clothespin with an image from the stamp set, Thriller.
Halloween gift bag-Stamped_My Creative Cottage


You could use any Halloween stamp set.  I like Creepy Cobwebs and Beware for random stamping as it the images are larger and cover an area quicker.  You can also load up a larger block with several images to create a background.  Stamping does not need to be perfect.  A little imperfection makes it even more personal. *wink.
Until Next Time-
Be Blessed!
Sarita

Share
  • Pin it
  • Share
  • Tweet
  • Share
  • Email
Share
  • Pin it
  • Share
  • Tweet
  • Share
  • Email

Hooligans Happy Birthday Banner

9 / 23 / 1010 / 13 / 15

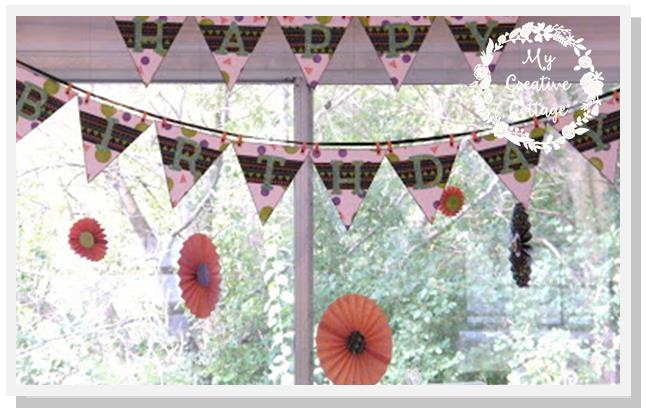
Happy Birthday Banner_My Creative Cottage
Click on photo for larger view.

I wish I could take credit for this adorable banner.  However, all props go to my team member, Trudy.  I think it is such a great way to show a Halloween themed paper for something other than Halloween. It is such a versatile paper pack with awesome vibrant colors.  The background was created by stamping dots from “Hit the Spot” stamp set and mini pennants from the Party Pennants set. The letters were cut out on the Cricut with Doodletype and were covered in prisma glitter. So CUTE!

Have you made a decorative banner?   I would love to see what you come up with.

Until Then-
Blessings-
Sarita

Share
  • Pin it
  • Share
  • Tweet
  • Share
  • Email
Share
  • Pin it
  • Share
  • Tweet
  • Share
  • Email

3 Not so Scary Halloween Scrapbook Layouts

9 / 21 / 1010 / 19 / 15

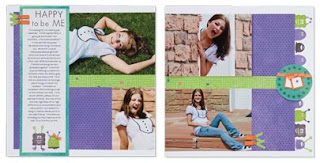
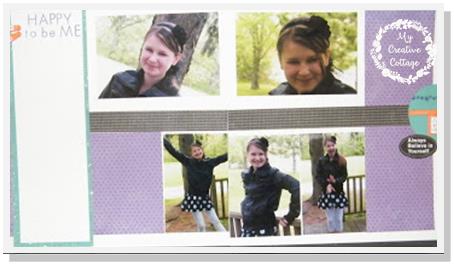
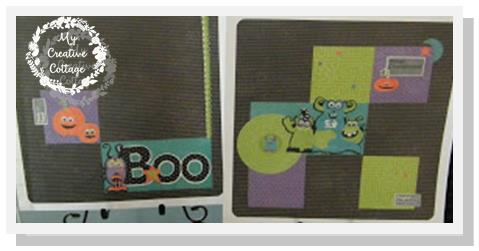
This is the bonus layout for the Hooligans Scrapbook Workshop. Although it is SUPER cute. When I first saw it, I really couldn’t picture what I would do with it. I think the monsters and the green was throwing me off.
 Then I remembered these photos that I took of Savana and decided to switch out the green strip of paper in the middle for the black paper with haha printed on it. With that little switch and leaving out the monsters I captured her at 12 perfectly in this layout. Obviously there is still journaling to do, but she is in charge of that.
Happy to be Me Age 12_scrapbook layout_My Creative Cottage
This is one of the things I LOVE about using a scrapbook kit.  It causes me to think outside the box. Chances are pretty good I never would have chosen the purple or blue to go with these photos. But I think it worked our great since black and white are the dominant colors.  The bright vibrant colors really reflect her personality.
Halloween Wild Thing Scrapbook Layout_My Creative Cottage
Boo Scrapbook Layout_My Creative Cottage

By using the layout shown on the back of the stickers and tweaking it a bit, this went together quickly. I can’t wait to do this with my group tonight. I love having photo ready layouts.

 Until Next Time-
Blessings-
Sarita
Share
  • Pin it
  • Share
  • Tweet
  • Share
  • Email
Share
  • Pin it
  • Share
  • Tweet
  • Share
  • Email

My Scrapbook Studio- Classroom Complete!

9 / 17 / 1010 / 13 / 15

I know you have been waiting patiently!  I had an awesome open house last weekend and everyone was so excited for me and the results of our “makeover”  So, as promised now that the event is over I am posting pics.  If you don’t know the story of how all this began, click on My Creative Cottage for the back story.

How did this all happen? Why now? were the questions. Long story short. I share this space with my team of consutlants.  When Heidi and I were talking about dates she needed we started talking about projects I wanted to complete in there. I am always dreaming you know.  As it turns out, her hubby works in construction doing flooring.  So, it was born.  Adding the floor meant I had to move everything out. So, naturally we had to paint the walls. The color I always wanted was sweet leaf.  And it’s like “If You Give a Mouse a Cookie”. If I was getting that color on my walls all my furniture had to be painted. I love black for it’s elegance and dramatic effect. I have loved toile and this color palette forvever.  I am a classic girl I guess.
Keep in mind, this is still a work in progress and I will be posting a few more pics soon.

I chose sweet leaf for the walls. I actually took the cardstock swatch in and they matched it perfectly!  All of this was done (except for the floor) with paint and reorganization.
Here we cut the long shelves down and split them to create more of a design element and I needed an inspiration board. I trypically work here standing up. Everything is within my reach so it works out really well. I even organized my drawers so i can find everything. Imagine that! *wink!
This antique amore used to be a sea foam green, with doors. I painted it black and hubby added a shelf. I like it for open display. At one time we used this for our TV in our bedroom so it didn’t have a back. I left it that way and I really like the sweet leaf wall as the back drop for the artwork.

Again, here we split the shelves and added a cabinet in between.  I also painted my shutters black. Which serves as a great card display and the work really stands out with the black background.  The custom curtains really show now with the new floor. Those were made by my girl, Trudy. She is amazingly talented. She also made the chair back cover and bought me that cute pillow.  That chair was a “gift” from my hubby a few years ago. He found it on the side of the road and brought the poor, ragged seat thing home to me.  It was in good hands though. It looks great now!

I really could not have done ANY of this without my husband, and my partner in crime (just scraplifting-it’s ok) and crafting, Trudy. They dedicated a whole weekend to this endeavor and of course it happened to be on the HOTTEST and most humid days of the summer.  I was prepared with lots of chocolate (for my hubby of course) and endless bottles of water. Scott played “his” music from his Ipod and we literally ROCKED it out!!!

Here are some of the behind the scenes photos.
Thsi what it looked like before the mayhem of painting began.  Isn’t the floor beautiful? Guess what? when you drop a brad now, you can FIND IT!!


We couldn’t have done it without Krylon spray paint. It dries in minutes so you can keep truckin’.  If you look close you can see the red trigger sprayer thing she is using. This was GOLDEN! No painted fingers or cramps in your hands.  For only a few bucks you add it to any spray paint can and it works like a CHARM! I think in total we went through 15 cans.
Before the cabinet was painted. YIKES!

Thanks for looking and I hope you are inspired to pick up a can of spray paint. If you have any questions, please ask. I just love to talk design and trash to treasure.

Until Then-
Blessings-
Sarita

Share
  • Pin it
  • Share
  • Tweet
  • Share
  • Email
Share
  • Pin it
  • Share
  • Tweet
  • Share
  • Email

Thriller- Elegant Halloween Mask

9 / 1 / 1010 / 14 / 15

Welcome to our Stamp of the Month Blog Hop! We will be featuring September’s SOTM, which is Thriller, a set of 15 stamps with infinite possibilties for scrapbooking, card making and paper crafting. For the Halloween season and beyond. just look at those flourishes!

If you have come here from Chris’ Blog, you are on the right path!  This is simple to do – just click on the link at the end of the post on each blog to move to the next one! Here we go!Thriller Elegant Halloween Mask_My Creative Cottage

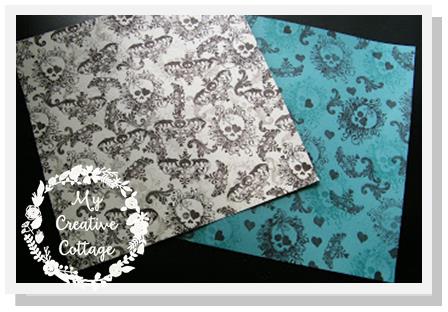
As soon as I saw this stamp I was drawn to random stamping and wanted to make my own paper for a special mask.  I love toile and I have seen a trend in Halloween decorations with black and white so it just made sense.  This is about as dressed up I would get *wink.
The ribbon is not CTMH. I am in the middle of a studio remodel and can’t locate my ribbon.
For added bling, interest and dimension I added our new licorice opaques and our ever popular bitty sparkles.  I even layered bitty sparkle on top of opaques.
I started out random stamping a piece of colonial cardstock. I did some second generation stamping as well in the background to create another color. Then I had to try it out with this gorgeous Lagoon cardstock, because why not??
Random Stamping Halloween_My Creative Cottage
Now “Hop” on over to Brae’s Blog to see her work! Be sure to visit all the talented Consultants at their Blogs to get some great crafting ideas.
Until Next Time-
Blessings-
Sarita
Share
  • Pin it
  • Share
  • Tweet
  • Share
  • Email
Share
  • Pin it
  • Share
  • Tweet
  • Share
  • Email

Posts navigation

Previous Page 1 2 … 19 20 21 22 23 … 40 41 Next Page

Hi! It's me, Sarita. A.K.A. Blessed Scrapper. DIY is in my DNA. Life is a constant adventure with a child on the Autism Spectrum and my own AD/HD. I am a life long learner and I love to share with others. So, I hope you'll find something here to inspire you!

Archives

Meta

  • Log in
  • Entries feed
  • Comments feed
  • WordPress.org

Tags

3-D 3x3 cards Anthology autism Autism Awareness Month barn wood Birthday birthday cards birthday craft Blog Hop card Cards Christmas Christmas Craft Class Close to My Heart Cricut Cricut Artiste Cartridge CTMH DIY Easter Fall family life Gift Bag Halloween home decor kids mini album My Creative Cottage paper crafting Party Decorations random stamping scrapbooking scrapbooking layouts scrapbook layout Scrapbook Layouts stamping Stamp of the Month Studio J tags Valentines Vintage Vinyl Wall Art Waterford
Site made with ♥ by Angie Makes
Angie Makes Feminine WordPress Themes
Manage Cookie Consent
To provide the best experiences, we use technologies like cookies to store and/or access device information. Consenting to these technologies will allow us to process data such as browsing behavior or unique IDs on this site. Not consenting or withdrawing consent, may adversely affect certain features and functions.
Functional Always active
The technical storage or access is strictly necessary for the legitimate purpose of enabling the use of a specific service explicitly requested by the subscriber or user, or for the sole purpose of carrying out the transmission of a communication over an electronic communications network.
Preferences
The technical storage or access is necessary for the legitimate purpose of storing preferences that are not requested by the subscriber or user.
Statistics
The technical storage or access that is used exclusively for statistical purposes. The technical storage or access that is used exclusively for anonymous statistical purposes. Without a subpoena, voluntary compliance on the part of your Internet Service Provider, or additional records from a third party, information stored or retrieved for this purpose alone cannot usually be used to identify you.
Marketing
The technical storage or access is required to create user profiles to send advertising, or to track the user on a website or across several websites for similar marketing purposes.
Manage options Manage services Manage {vendor_count} vendors Read more about these purposes
View preferences
{title} {title} {title}